Forge is an excellent Emacs package that extends Magit to browse and interact with Pull Requests and Issues on GitHub, GitLab, and other source code + dev tools websites. In addition, Forge fetches and stores data locally, making browsing fast, and working offline after a sync.
The name of the package derives from the term for online source code hosting like GitHub and GitLab — code forges. Unfortunately, I easily get lost between these two meanings when reading docs or articles on the subject. So, further, in the text, I will use just the word forge to refer to the package, and I will use the term code forge to refer to services like GitHub, GitLab, etc.
To authenticate your access to the code forge, the package needs to know three pieces of information:
- The type of your code forge and its API endpoint. The package automatically derives this information based on the origin url in your git repo.
- Username. Usernames are stored and retrieved from git configuration.
- Access token. The token is retrieved using Auth-Source Emacs package, which has multiple storage backends. We will use macOS Keychain Access which is supported out of the box.
This post will cover the happy path:
- Activate Forge in Magit;
- Configure your GitHub username, so Forge can pick it up;
- Configure Emacs to look up secrets in macOS Keychain Access;
- Generate access token on GitHub and save it in macOS Keychain.
1. Initial Emacs Configuration
Forge is not loaded automatically. You can configure to do it with use-package
(use-package forge
  :after magit)
Or with raw elisp
(with-eval-after-load 'magit (require 'forge))
For details, see: Forge Manual > Getting Started > Loading Forge.
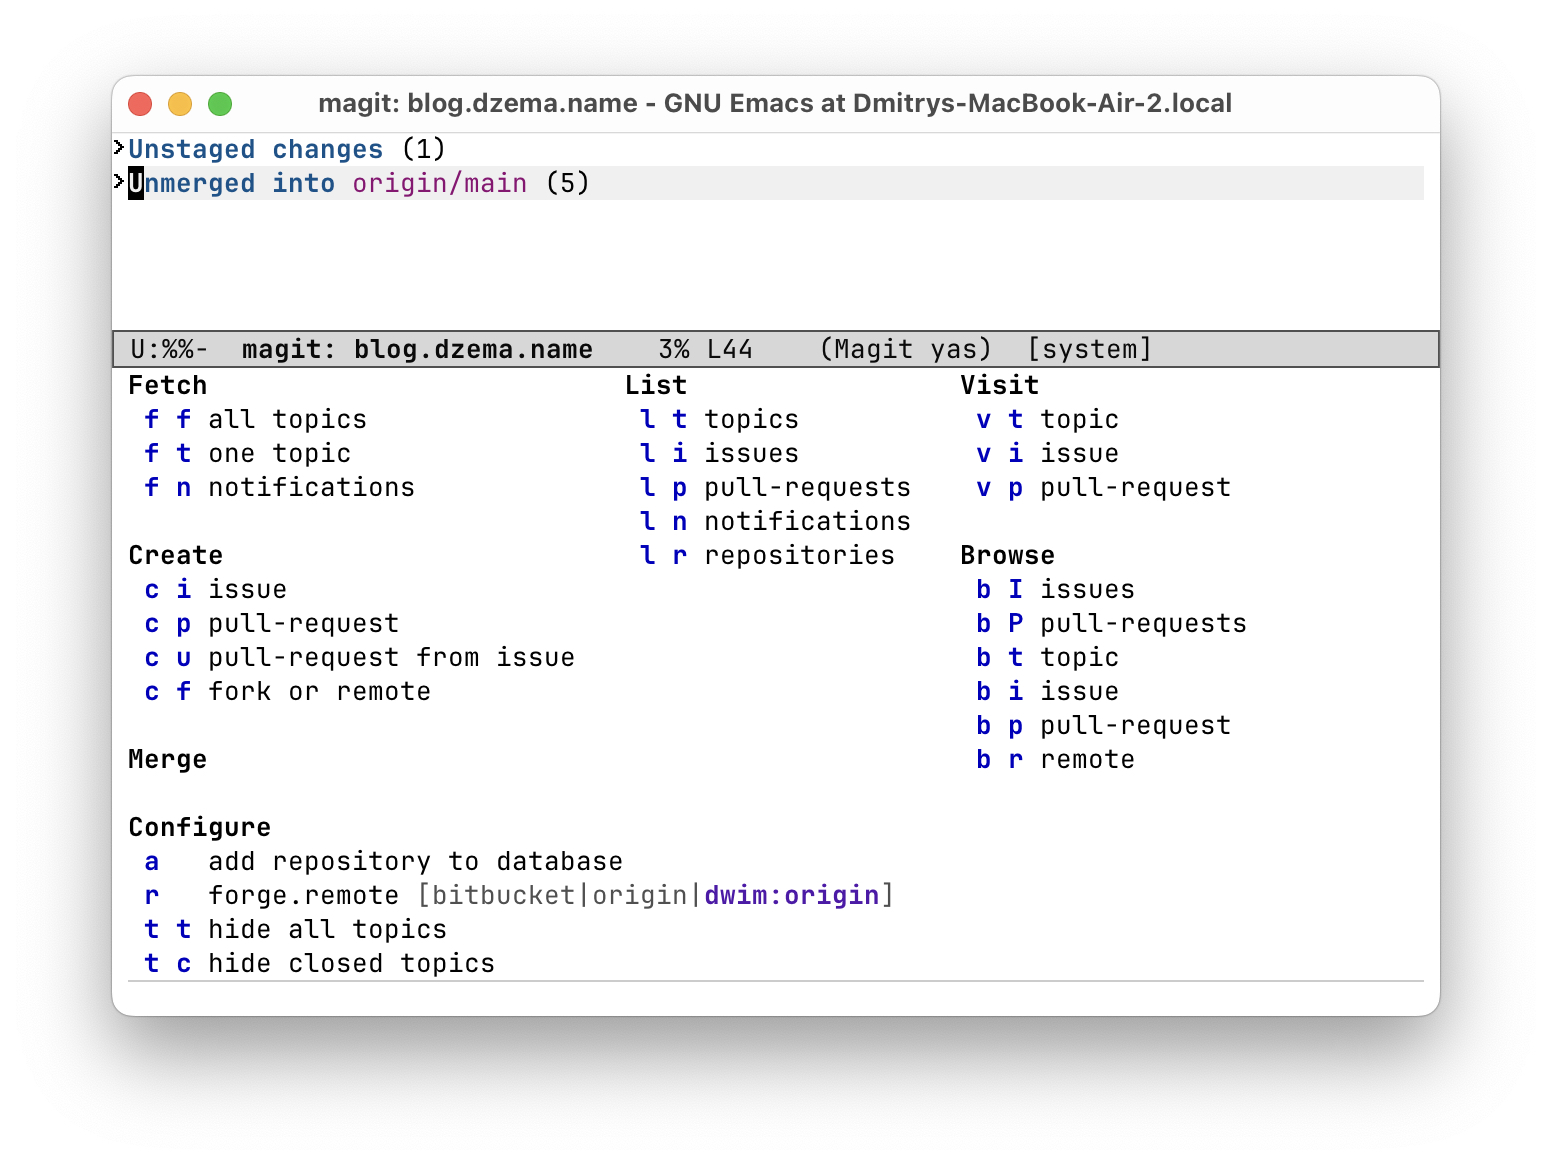
To check your configuration fire up Magit, then try to launch Forge by pressing N. You should see Transient window with Forge actions:
2. Configure Username
Forge picks up the username for your code forge from git configuration. This allows Forge to use one global username but override it on a per-repo basis. For example, you may use a personal account for most of the repos but have an organization-specific account to access work repositories.
You can configure your global username in your shell using the following command:
$ git config --global github.user <username>
For example in my case it is
$ git config --global github.user DimaD
To override username in individual repositories, use local git configuration:
$ cd workrepos/project1
$ git config --local github.user <other-username>
3. Configure Emacs To Look for Secrets in Keychain Access
Under the hood, the Ghub package will look for the token for your account using the auth-source library. To make it work with Keychain Access you need to update the variable auth-sources in Emacs:
(setq auth-sources
  '(macos-keychain-generic macos-keychain-internet))
4. Generate Token on GitHub
Go to GitHub Settings > Developer Settings > Personal access tokens and generate a new classic token with the following scopes repo, user, read:org.
Those scopes are required for Forge to work. You can read more in Forge Manual > Getting Started > Token Creation
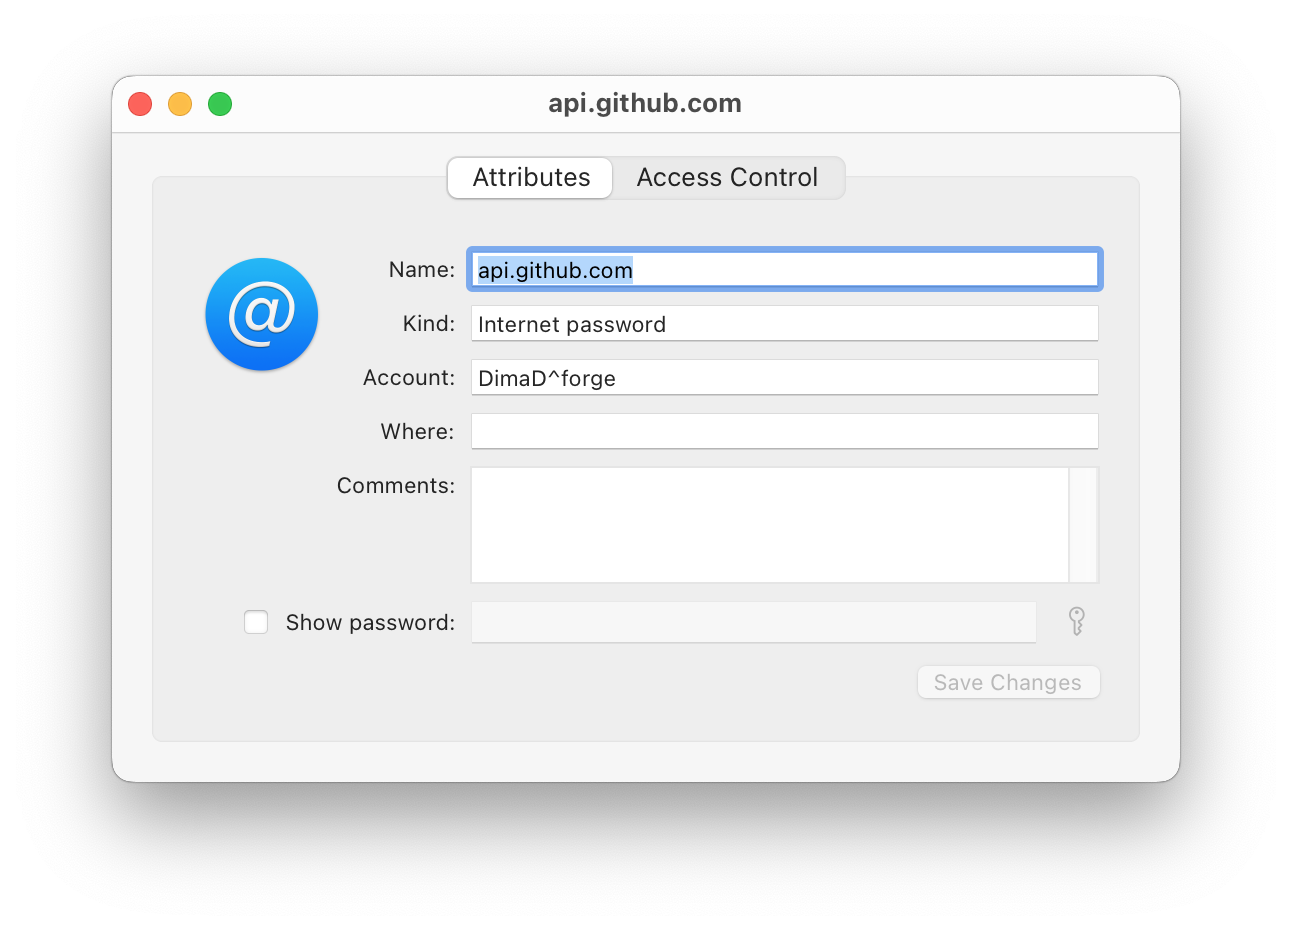
Now, we are going to store the token in Keychain Access. Unfortunately, I have not found a way to create records via UI accessible to Emacs, so you will need to use shell again. macOS provides a tool called security, which allows one to create and look up items in the keychain. You will need to provide the following information:
-aAccount name. It will look like<username>^forge(f.e. in my case, it isDimaD^forge). Note that the wordforgein the account name is the name of the Emacs package, and it is not the type of code forge you are using. This part confused me in the past as I tried to use Github here, which was a mistake.-sServer name. For GitHub, we will useapi.github.com(If you want to use GitLab or other code forges look for hostnames in Ghub documentation)-waccess token. We will append this argument at the end of our shell invocation so the tool will prompt us for the secret
To put it all together, run this in the shell:
$ security add-internet-password \
  -a <your-account-name>^forge \
  -s api.github.com -w
You will be prompted for a password, so copy-paste your token into it, then do it again to confirm.
You should be able to see your new item in Keychain Access UI:
You can test if auth-sources can pick up your key by running the following elisp code in the scratch buffer:
(auth-source-forget-all-cached)
(auth-source-search
  :host "api.github.com"
  :user "DimaD^forge")
If everything went well, you should see something along the lines of:
((:login nil :port nil :require nil :host "api.github.com" ...)
Or you will see nil if the token was not found. In this case, make sure you created the Keychain item via the command line and not the UI.
The Forge should now be operational.
Launch Magit in one of your repos and try to fetch topics with f n.
Next Steps
With the working authentication, it is time to learn how to use Forge. The best place for it is the Forge manual in your Emacs INFO viewer (C-h i) or online. If you want to use Forge with GitLab or other supported code forges I recommend you to go through the Ghub manual to understand different options for URLs, hosts, etc.
Thank you, Jonas, for the great Emacs packages, and clear docs.